1. What It Does
The serial-bt project turns an ESP32-S3 into a wireless keyboard bridge. It listens for text sent over Bluetooth (BLE) and retypes that text into whatever computer the board is plugged into — as if it were a physical USB keyboard.
In plain terms: you pair your phone to the board, type something in a BLE serial app, and the text appears on your PC. No drivers, no special software on the PC — the ESP32-S3 presents itself as a standard USB keyboard.
Why you'd want it
Send text or commands from a phone to a PC that has no Bluetooth, add quick shortcuts, or type into machines where you can't install anything.
Why it's clever
USB HID is a universal standard. Any OS (Windows, macOS, Linux) recognizes the board instantly as a keyboard with zero configuration.
bt_kb variant on your machine adds hotkey triggers like !term and !cc — this guide covers the simpler serial-bt firmware.2. How It Works
Three moving parts pass the text along a chain:
The protocol in detail
The board runs a BLE server exposing the Nordic UART Service (NUS) — a widely-used profile with the UUID 6E400001-B5A3-F393-E0A9-E50E24DCCA9E. NUS is the de-facto standard for "send raw text over BLE" apps, so most BLE serial apps in app stores work with it out of the box. When the phone writes a chunk of bytes to the write characteristic, the firmware's callback grabs those bytes and feeds them one character at a time into the USB HID keyboard object, which the host PC reads as keystrokes.
3. Parts You Need
Because everything happens over the board's built-in USB port and radio, the parts list is tiny:
| Item | Why | Notes |
|---|---|---|
| ESP32-S3 dev board | Runs the firmware; has native USB + BLE | Any S3 board with a USB port works (DevKitC-1, M5Stack, etc.) |
| USB-C / micro-USB cable | Power + HID output to the PC | Must be a data cable, not charge-only |
| A PC (Windows/macOS/Linux) | The thing you type into | Any OS — HID works everywhere |
| A phone with a BLE serial app | Source of the text | Recommended: Serial Bluetooth Terminal by Kai Morich (Android) |
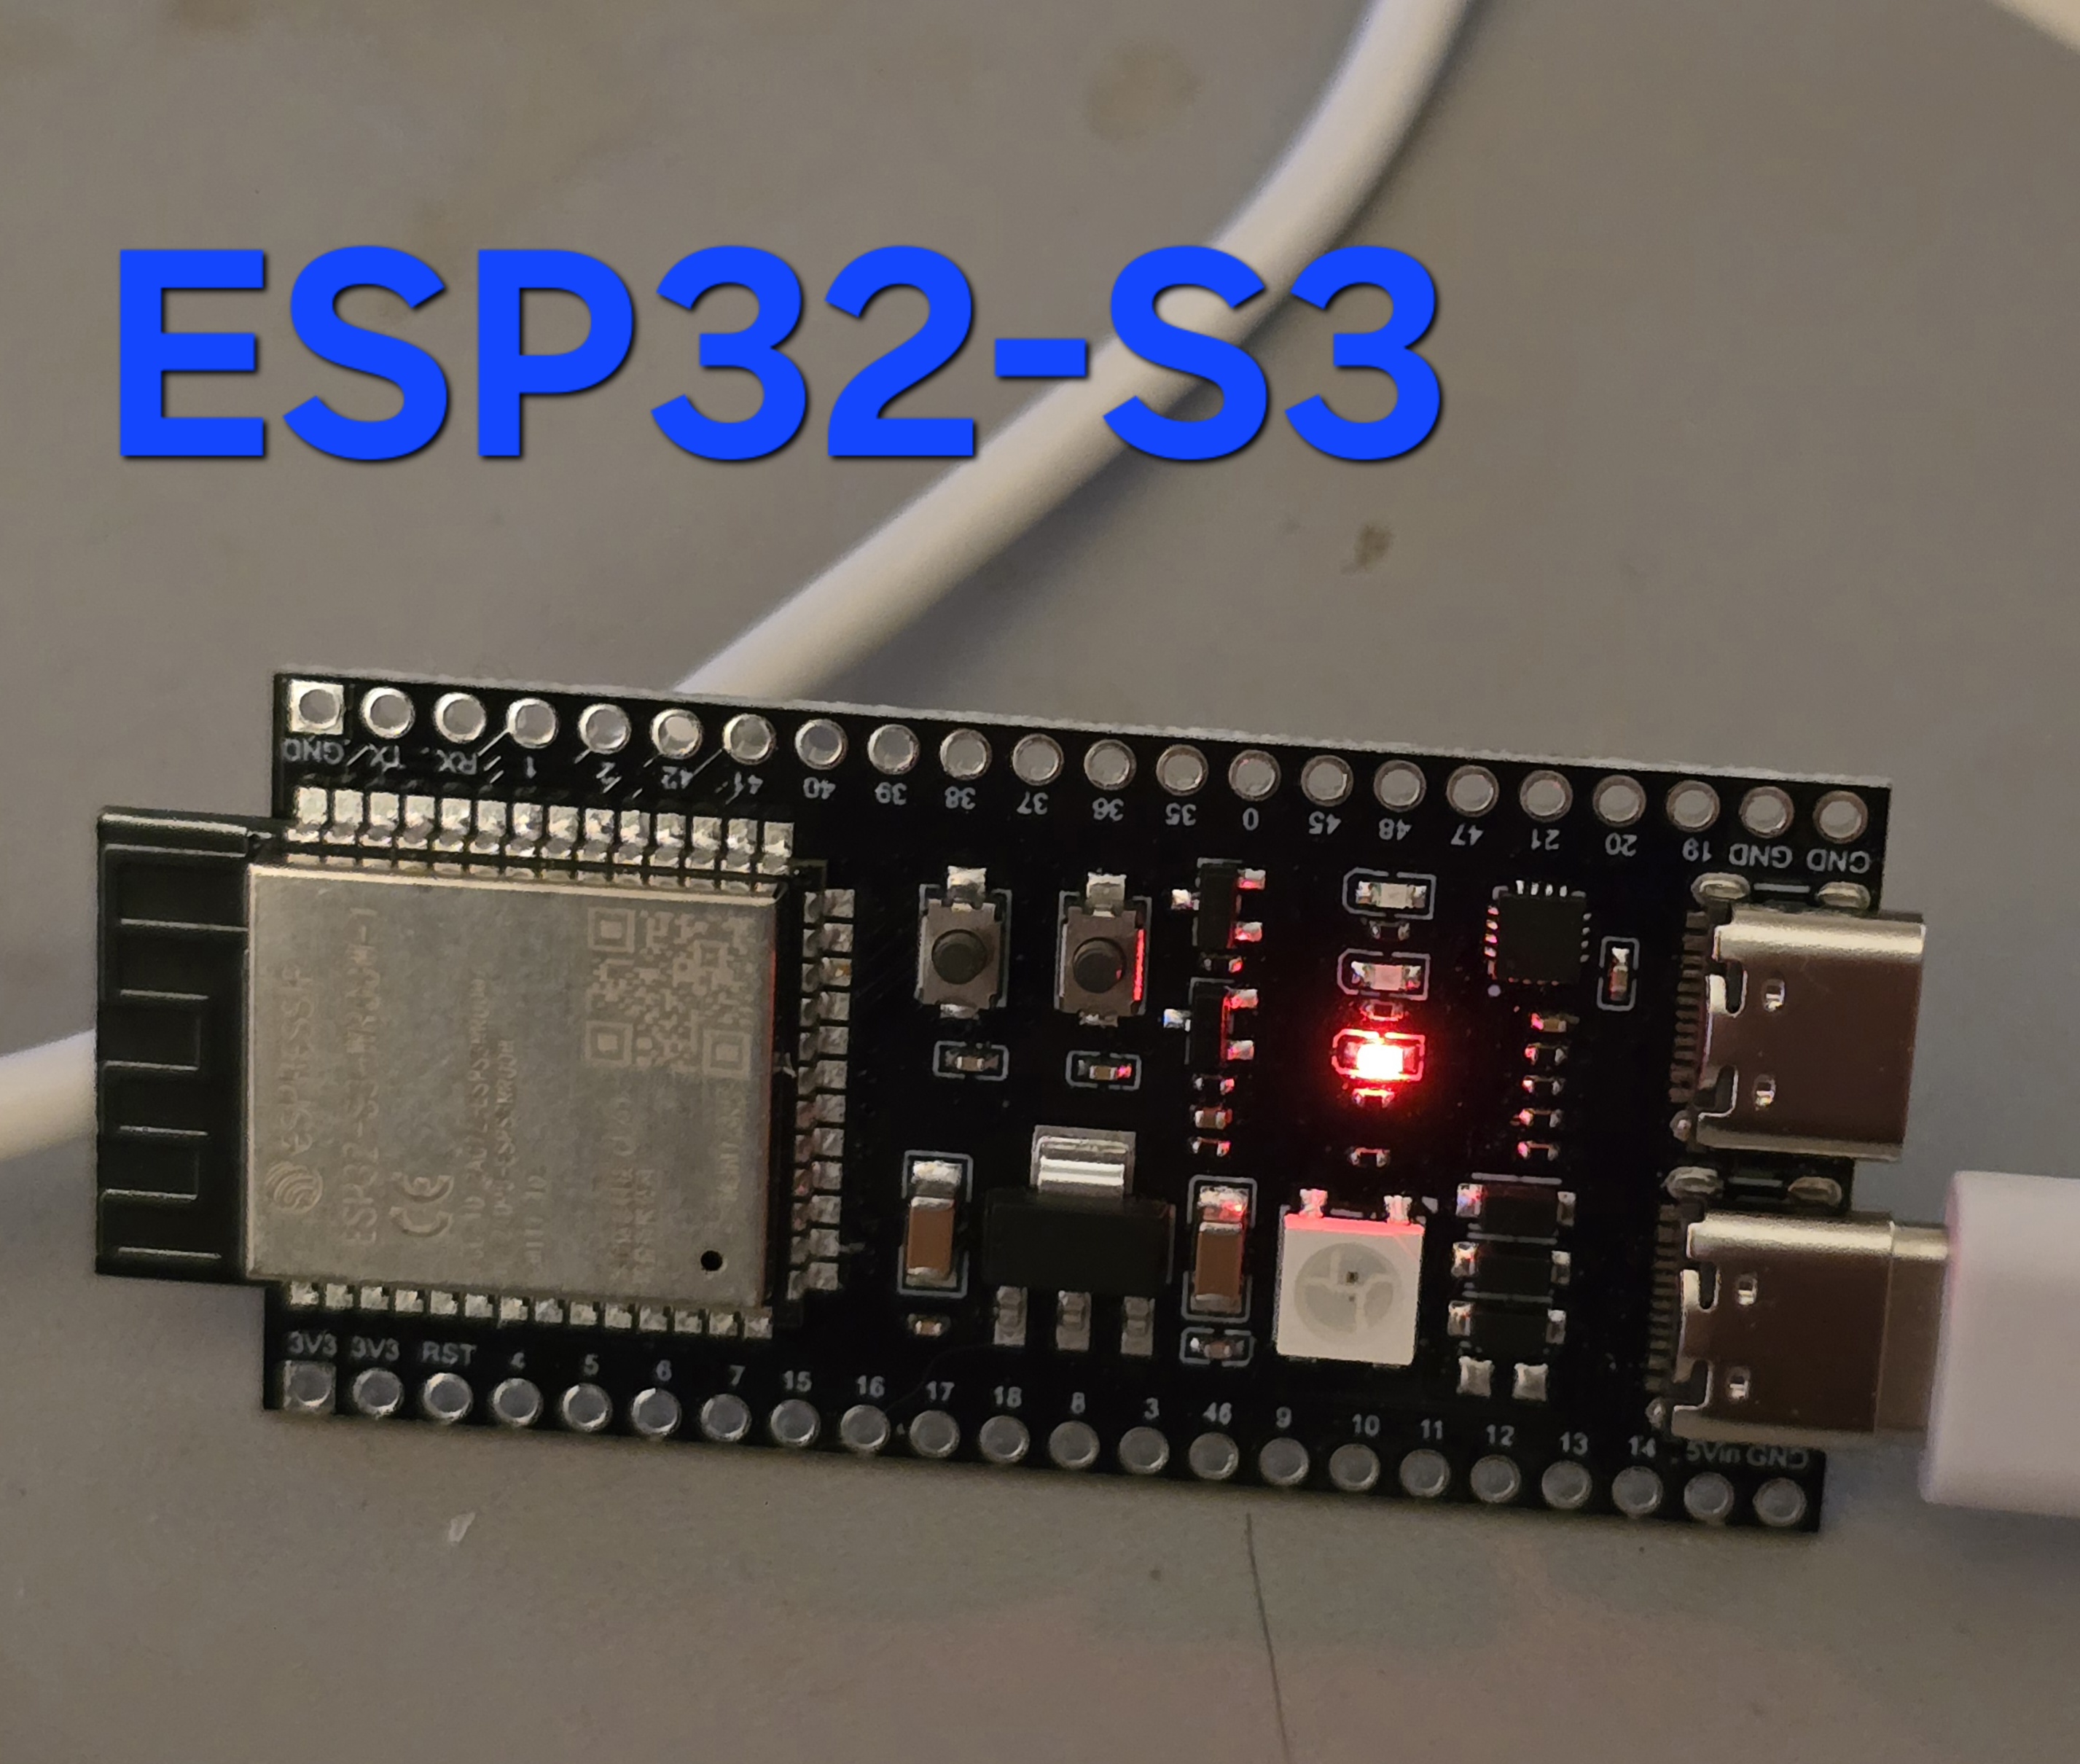
Your ESP32-S3 dev board — the only real hardware needed.
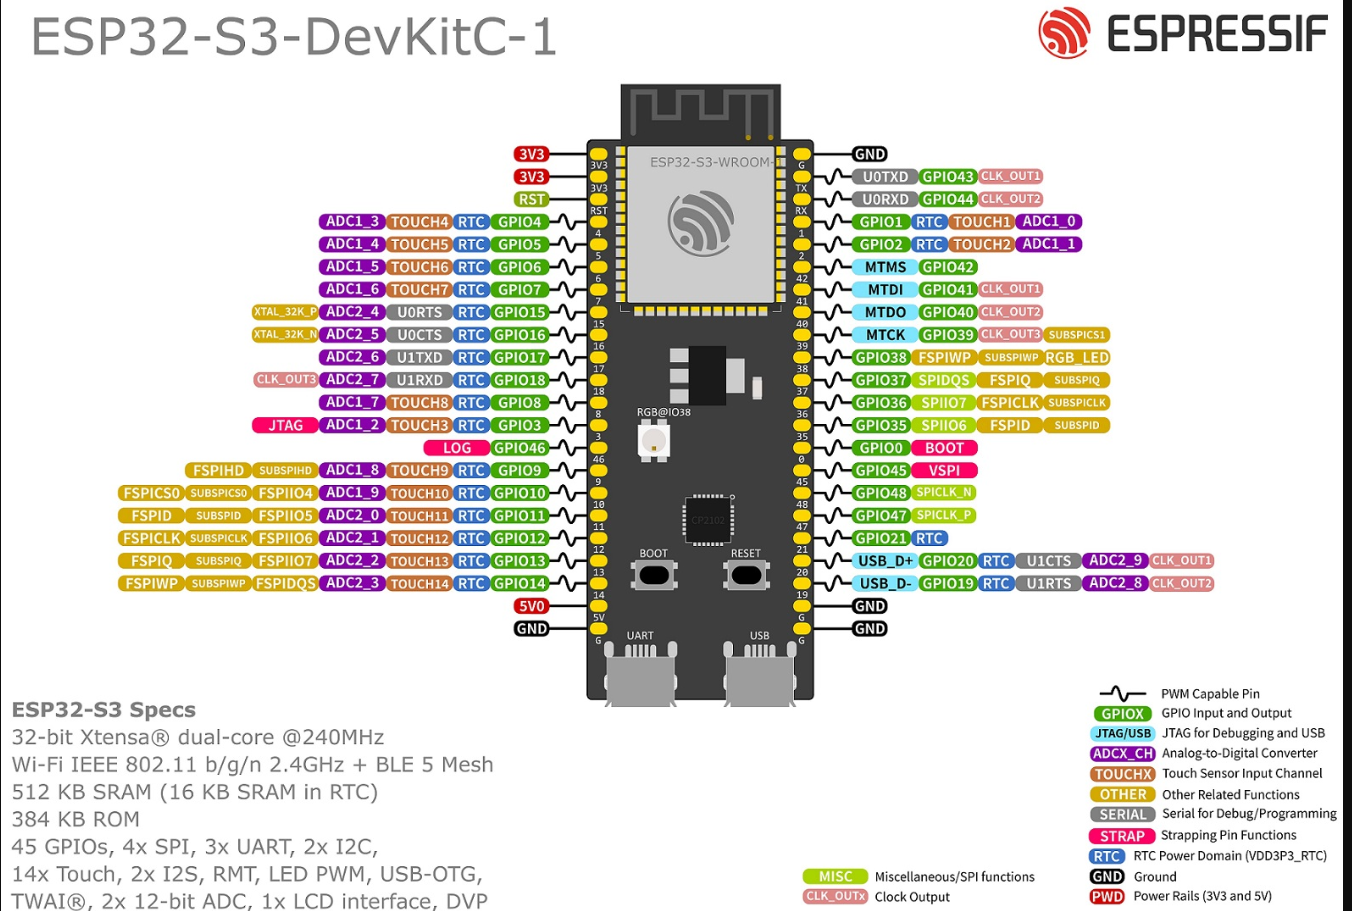
Reference pinout for the ESP32-S3 DevKitC-1. This project needs no GPIO wiring — only the USB port.
4. Toolchain Setup
Install VS Code
Download and install Visual Studio Code for your OS.
Install the PlatformIO extension
In VS Code, open the Extensions panel (Ctrl+Shift+X), search for PlatformIO IDE, and install it. PlatformIO handles the entire ESP32 toolchain — compiler, libraries, flashing — so you don't need to install Arduino IDE or ESP-IDF separately.
Clone the repo
Clone the project to your machine (or create the files manually in the next section):
git clone https://github.com/charlesscrimpshire/serial-bt.git
cd serial-btOpen the project in PlatformIO
In VS Code: File → Open Folder, pick the serial-bt folder. PlatformIO auto-detects the platformio.ini project and loads it into its Project Explorer.
5. Project Structure
A PlatformIO project is intentionally small. Here's exactly what you need:
serial-bt/
├── platformio.ini   ← build config (board, framework, libraries)
└── src/
    └── main.cpp     ← all the firmware lives here
That's it — two files. Everything else (compiler, USB stack, BLE stack) is pulled in by PlatformIO automatically.
6. platformio.ini Explained
This file tells PlatformIO what hardware you're targeting and which libraries to use. Every line matters:
[env:s3-devkit]
platform = espressif32       ; ESP32 chip family support
board = esp32-s3-devkitc1-n16r8   ; exact board = S3 + 16MB flash + 8MB PSRAM
framework = arduino          ; use the Arduino framework (simple API)
monitor_speed = 115200       ; baud rate for the serial debug console

build_flags =
    -D ARDUINO_USB_MODE=1            ; enable native USB (not USB-serial-JTAG)
    -D ARDUINO_USB_CDC_ON_BOOT=1     ; keep serial console on native USB
    -D CONFIG_TINYUSB_HID_ENABLED=1  ; turn on TinyUSB's HID support
    -D CONFIG_TINYUSB_CDC_ENABLED=1  ; turn on TinyUSB serial (debug)

lib_deps =
h2zero/NimBLE-Arduino@^1.4.0 ; the NimBLE BLE stack library| Setting | What it does | Why it matters |
|---|---|---|
board | Chooses the device profile | Must match your S3 variant (flash/PSRAM sizes) |
ARDUINO_USB_MODE=1 | Uses native USB peripheral | Required for HID keyboard functionality |
CONFIG_TINYUSB_HID_ENABLED=1 | Enables HID in TinyUSB | Without it, USBHIDKeyboard won't work |
NimBLE-Arduino | BLE stack library | Lightweight, stable BLE implementation |
build_flags. Without native USB + HID enabled, the board defaults to a plain serial device.7. Code Walkthrough
Here's the entire src/main.cpp, explained section by section.
7.1 Includes & Configuration
#include <Arduino.h>
#include <NimBLEDevice.h>      // BLE stack
#include <USB.h>               // native USB setup
#include <USBHIDKeyboard.h>    // the HID keyboard class

// Nordic UART Service UUIDs - the "phone writes here" contract
#define SERVICE_UUID        "6E400001-B5A3-F393-E0A9-E50E24DCCA9E"
#define CHARACTERISTIC_UUID "6E400002-B5A3-F393-E0A9-E50E24DCCA9E"

static BLECharacteristic *pCharacteristic;  // handle to our write characteristic
static bool deviceConnected = false;        // BLE link state

// The keyboard object - typing happens through this
USBHIDKeyboard HIDKeyboard;
The two UUIDs are the Nordic UART Service standard: the service itself, and the characteristic the phone writes text to. Keeping them standard means any NUS-aware app connects without custom code on the phone side.
7.2 Connection callbacks
class ServerCallbacks : public NimBLEServerCallbacks {
    void onConnect(NimBLEServer* pServer) {
        deviceConnected = true;
        Serial.println("BLE Client Connected!");
    }
    void onDisconnect(NimBLEServer* pServer) {
        deviceConnected = false;
        Serial.println("BLE Client Disconnected!");
        NimBLEDevice::startAdvertising();  // go back to being discoverable
    }
};
These fire when a phone pairs and unpairs. The important trick is on disconnect: the board immediately restarts advertising, so you can reconnect without re-flashing or rebooting.
7.3 The core: writing text as keystrokes
class CharacteristicCallbacks : public NimBLECharacteristicCallbacks {
    void onWrite(NimBLECharacteristic* pCharacteristic) {
        std::string value = pCharacteristic->getValue();   // grab the BLE payload
        if (value.length() > 0) {
            Serial.printf("Received %d bytes via BLE\n", value.length());

            // The heart of the project: type each byte into the PC
            for (size_t i = 0; i < value.length(); i++) {
                char c = value[i];
                HIDKeyboard.write(c);   // send one keystroke
                delay(10);              // let the PC keep up
            }
        }
    }
};
Every time the phone writes a chunk of text, this callback loops over the bytes and hands each one to HIDKeyboard.write(). The delay(10) spaces keystrokes out so the PC's input buffer doesn't drop characters during fast bursts.
7.4 setup(): bring it all up
void setup() {
    Serial.begin(115200);
    Serial.println("Serial-BT Bridge Starting...");

    // 1) USB side first - become a keyboard
    HIDKeyboard.begin();
    USB.begin();
    delay(1000);  // let the host enumerate the USB device

    // 2) BLE side - become a server named "Serial-BT"
    NimBLEDevice::init("Serial-BT");
    NimBLEDevice::setPower(ESP_PWR_LVL_P9);  // max TX power for range

    NimBLEServer *pServer = NimBLEDevice::createServer();
    pServer->setCallbacks(new ServerCallbacks());

    // 3) Expose the Nordic UART Service
    NimBLEService *pService = pServer->createService(SERVICE_UUID);
    pCharacteristic = pService->createCharacteristic(
        CHARACTERISTIC_UUID,
        NIMBLE_PROPERTY::WRITE     // phone may only write to this
    );
    pCharacteristic->setCallbacks(new CharacteristicCallbacks());
    pService->start();

    // 4) Advertise so phones can find us
    NimBLEAdvertising *pAdvertising = NimBLEDevice::getAdvertising();
    pAdvertising->addServiceUUID(SERVICE_UUID);
    pAdvertising->setScanResponse(true);
    NimBLEDevice::startAdvertising();

    Serial.println("BLE Advertising as 'Serial-BT'");
    Serial.println("Send text via BLE -> typed as USB HID keyboard");
}

void loop() {
    delay(10);  // all the work happens in callbacks
}
Note the order: USB first, then BLE. The board must be recognized as a keyboard before it starts handling BLE writes, and the 1-second delay lets Windows/Linux finish enumerating the device.
8. Build & Flash
Plug in the board
Connect your ESP32-S3 to your PC with a data USB cable. On Linux, check it shows up:
ls /dev/ttyACM* # typical ESP32-S3 serial portBuild the firmware
In PlatformIO, click the ✓ Build button (or run from terminal):
pio runThe first build downloads the ESP32 toolchain and dependencies — expect it to take several minutes.
Flash it
Click → Upload in PlatformIO, or:
pio run -t uploadPlatformIO auto-detects the serial port. If it picks the wrong one, set it in platformio.ini:
upload_port = /dev/ttyACM0Watch the debug console (optional)
Open the PlatformIO Serial Monitor (🔌 icon). You should see:
Serial-BT Bridge Starting...
BLE Advertising as 'Serial-BT'
Waiting for connection...dialout group to access /dev/ttyACM*: sudo usermod -a -G dialout $USER, then log out and back in.9. Using It
Check it appears as a keyboard
After flashing, the board enumerates as a USB keyboard. On Linux, verify with:
ls /dev/input/by-id/ | grep -i espressif
# usb-Espressif_Systems_ESP32S3_DEV_...-event-kbdInstall Serial Bluetooth Terminal (Kai Morich)
This is the app I use to control the board. Serial Bluetooth Terminal by Kai Morich is a line-oriented serial/UART terminal for Android used to interact with microcontrollers and embedded systems via Bluetooth. Get it here:
📲 Download from Google Play →Connect to "Serial-BT"
Open the app, scan, and pair with the device named Serial-BT. The debug console shows BLE Client Connected! when the link is established.
Type away
Focus any text field on your PC (Notepad, a terminal, a browser), then type in the phone app and hit send. The text appears on the PC as if you typed it.
10. Troubleshooting
| Symptom | Likely cause | Fix |
|---|---|---|
| Board not seen as keyboard | Missing build flags, or charge-only cable | Verify CONFIG_TINYUSB_HID_ENABLED=1; try a data cable |
| Can't find "Serial-BT" in app | Board not advertising yet, or out of range | Check the serial log for "Advertising"; move phone closer; reboot board |
| Connects but no typing | App writes to wrong characteristic | Use an NUS-compatible app; this firmware uses the NUS write characteristic |
| Missing characters in fast bursts | The PC can't keep up | Increase delay(10) to delay(20) in the write loop |
| Flashing fails / port not found | Port permissions or wrong port | Join dialout group; set upload_port |
11. Next Steps & Ideas
Now that the bridge works, there are easy ways to level it up:
- Command triggers — send
!termand have it press Ctrl+Alt+T to open a terminal (already done in thebt_kbvariant). - Multi-line buffering — collect a full message before typing, instead of per-chunk.
- Auto-reconnect feedback — blink an LED when the phone connects/disconnects.
- Macro keys — map short tokens to long phrases you type often.
- Encryption — require a BLE passkey so only you can send keystrokes.
- Go full rig — see the Bridge Keyboard Android app: the phone-side companion for this firmware, adding voice dictation and a macro deck.