1. What It Does
The unoq-weather-matrix project turns an Arduino UNO Q into a desktop weather display. On a loop it:
- Scrolls
Scrimptechacross the built-in 12×9 blue LED matrix - Scrolls
Laurel MS - Shows the live temperature in °F (static, 5 seconds)
Meanwhile, all four onboard RGB LEDs act as one hot/cold indicator: blue below 99 °F, red at 99 °F or above. If the network fetch fails, the matrix scrolls NO NET and the LEDs go blue (safe fallback).
Why real observations
Forecast APIs interpolate "current" values and can wobble between fetches. NWS observations are the actual measured air temperature at a station — the display tracks a real thermometer.
Why two control paths
The UNO Q is dual-chip. LED1/LED2 are controlled by the Linux half; LED3/LED4 by the MCU. Both halves poll the same station, so display and LEDs always agree.
f >= 99 in unoq-weather-matrix.ino and temp_leds.py. Change it once per file and the whole display re-flips.2. How It Works
The UNO Q is a dual-chip board: an STM32U585 MCU (Cortex-M33) plus a Qualcomm QCM2290 Linux companion. This project uses both halves at once.
The two control planes
The MCU fetches the temperature over the board's RouterBridge (IPC to the Linux router process), converts it to °F, and drives the matrix plus LED3/LED4. On the Linux side, a tiny Python script polls the same station and writes LED1/LED2 brightness through /sys/class/leds. Both halves compute the identical °F value, so the LEDs never disagree with the matrix.
3. Hardware
The Arduino UNO Q packs an STM32U585 MCU and a full Linux system on one board:
| Half | Part | Used for |
|---|---|---|
| MCU | STM32U585 (Cortex-M33, 2 MB flash / 786 KB SRAM) | Matrix, LED3/LED4, RouterBridge fetch |
| Linux | Qualcomm QCM2290 "Imola" (4× Kryo-V2, Debian, ~3.6 GB RAM) | Router/TLS, LED1/LED2 via sysfs |
| Display | Built-in 12×9 monochrome blue LED matrix | Scroll + static temperature |
| Indicators | 4× onboard RGB LEDs | Hot/cold status |
Where each LED is controlled from
| LED | Channels | Controlled by | Notes |
|---|---|---|---|
| LED1 | red:user / green:user / blue:user | Linux sysfs | 1 = on |
| LED2 | red:panic / green:wlan / blue:bt | Linux sysfs | 1 = on |
| LED3 | LED3_R/G/B pins | MCU | analogWrite PWM, inverted |
| LED4 | LED4_R/G/B pins | MCU | digitalWrite, active-low |
The board
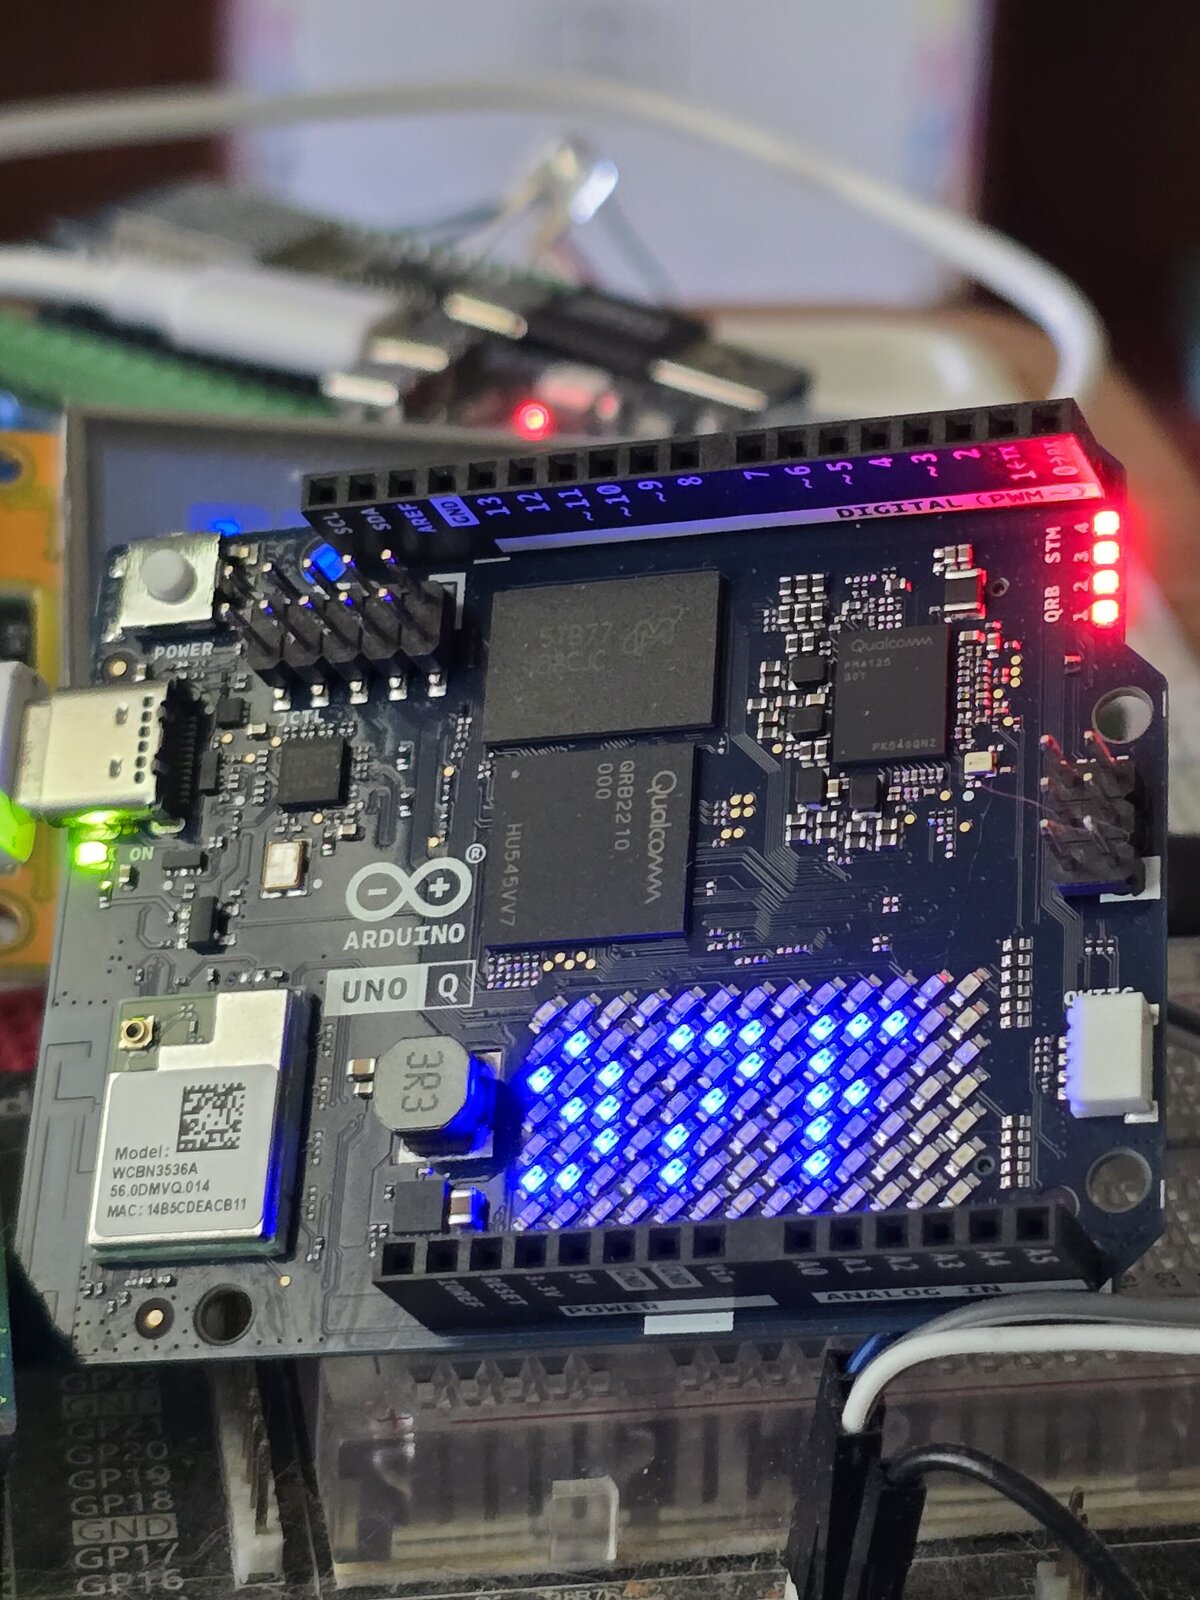
The UNO Q Weather Matrix on the desk — matrix scrolling the temperature, with the board sitting in its power state.
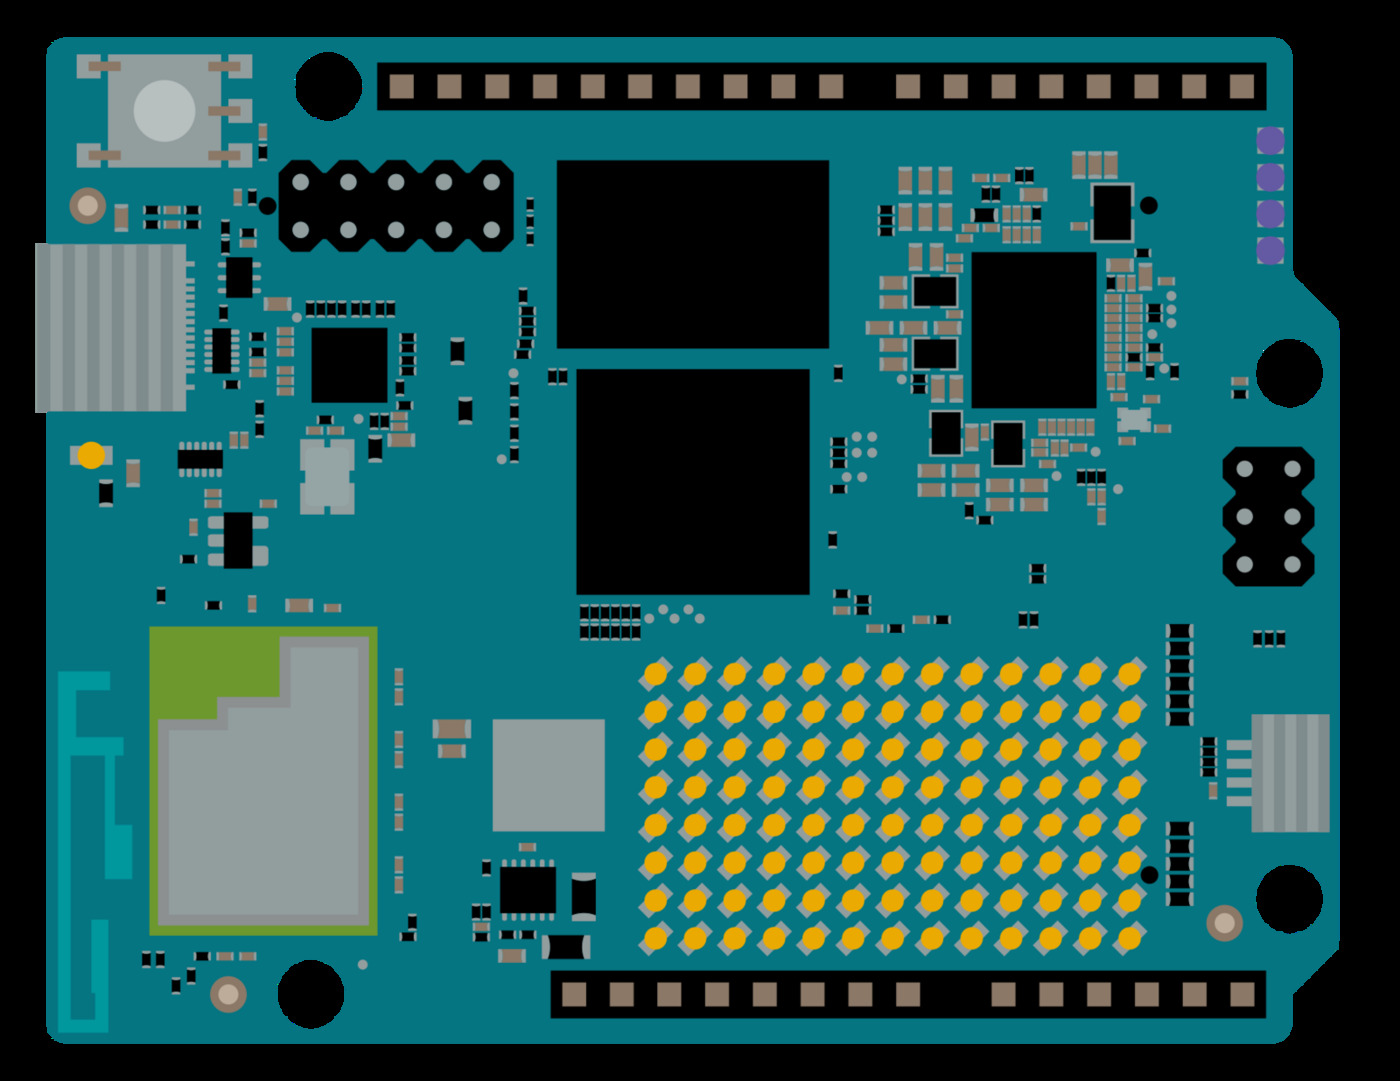
The Arduino UNO Q — a dual-chip board: STM32U585 MCU + Qualcomm QCM2290 Linux computer on a UNO footprint.
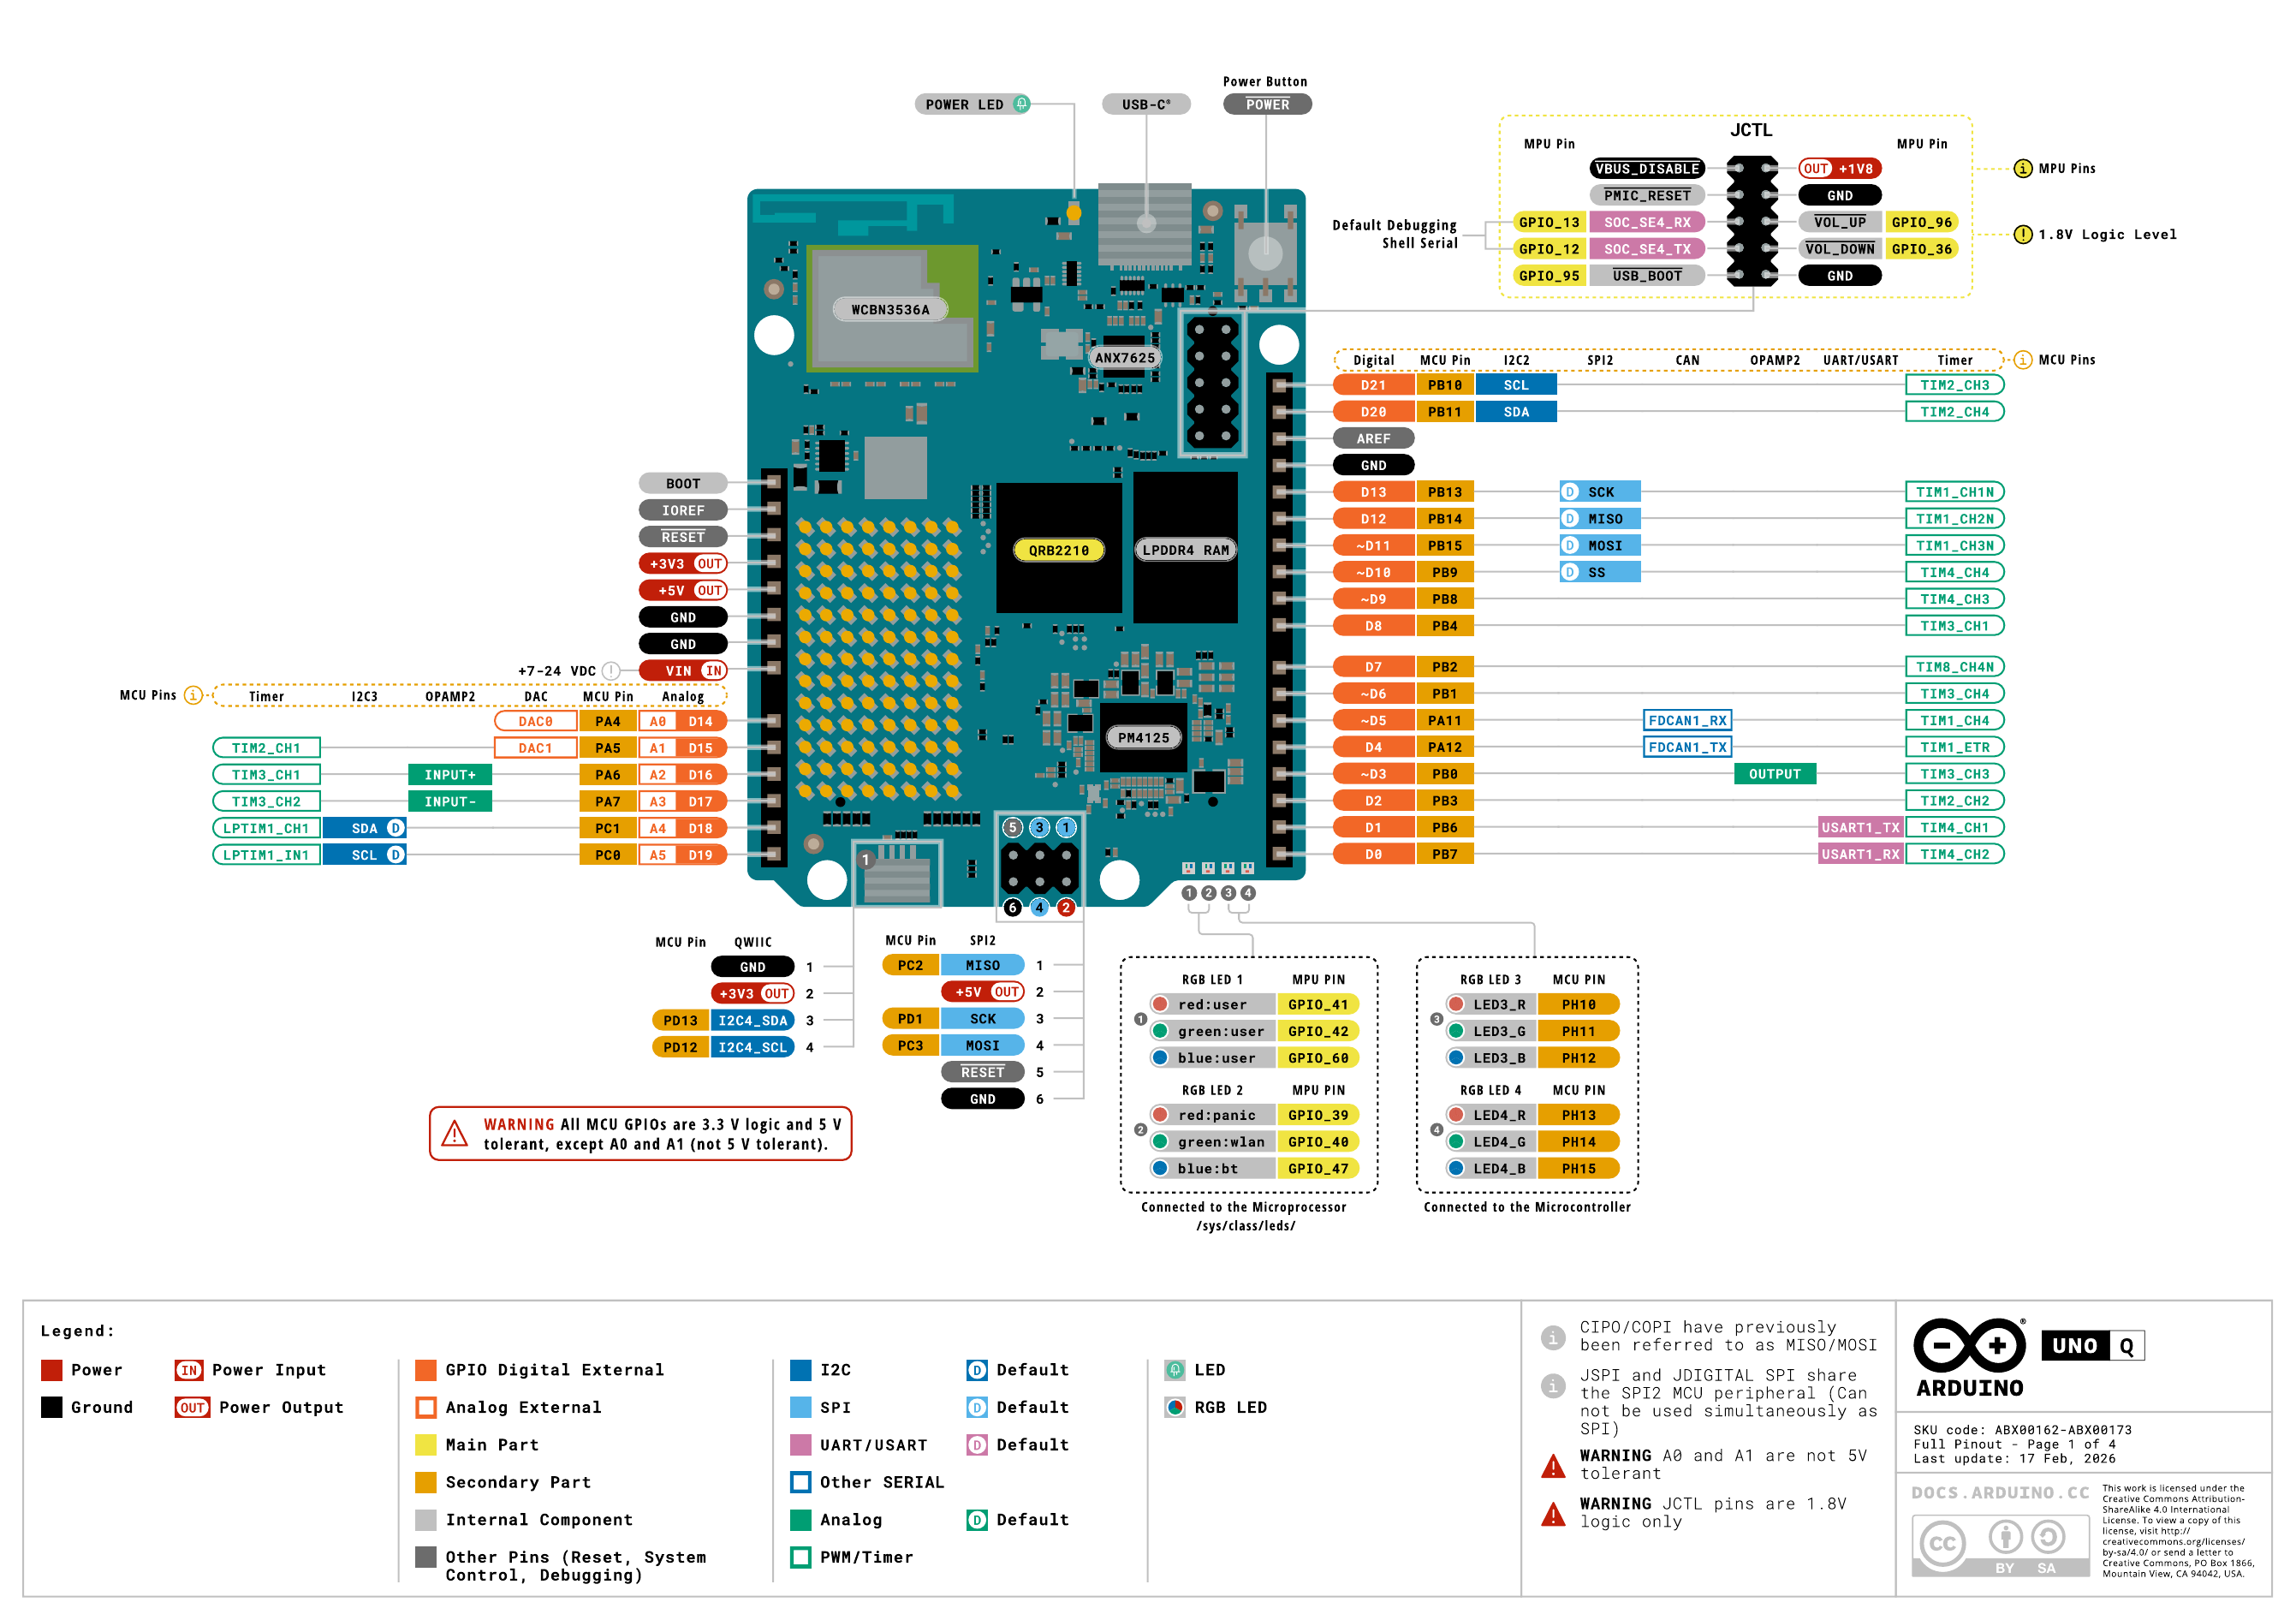
Reference pinout for the Arduino UNO Q. This project needs zero wiring — everything runs on the onboard matrix, LEDs, and the built-in Wi-Fi.
4. The Data Source
This project started on a forecast API, and the displayed value wobbled between fetches — the "current" field is interpolated, not measured. The fix was switching to real observations from the NOAA/NWS station at Laurel/Noble Field (KLUL), the nearest station to Laurel, MS (31.69, −89.13):
Endpoint
https://api.weather.gov/stations/KLUL/observations/latestThe value lives at properties.temperature.value — a Celsius float (e.g. 34.8 → 95 °F). It can be null on a bad sample, which the code treats as a failed fetch.
Headers
The NWS API requires a User-Agent header identifying your app, or it refuses the request. Both the sketch and the Python script send arduino-unoq/1.0.
Refresh rate
Observations refresh roughly every minute, so the display tracks a real thermometer instead of a model. If the TLS fetch fails, the sketch falls back to open-meteo over plain HTTP on port 80.
"temperature" sits past byte 2000 — the fetch buffer had to be raised to 8 KB. A 1200-byte buffer silently fails the parse.5. Project Structure
A two-file project, split across the two halves of the board:
unoq-weather-matrix/
├── unoq-weather-matrix.ino   ← MCU sketch: matrix + LED3/LED4
├── temp_leds.py              ← Linux companion: LED1/LED2
├── docs/notes.md             ← hands-on notes & gotchas
└── scripts/
    ├── flash.sh              ← arduino-cli compile + upload
    └── run_temp_leds.sh      ← push + start the companion
6. Code Walkthrough
6.1 setup(): bring up the two planes
void setup() {
  matrix.begin();
  matrix.textFont(Font_5x7);
  matrix.textScrollSpeed(100);
  matrix.clear();
  pinMode(LED3_R, OUTPUT);
  pinMode(LED3_G, OUTPUT);
  pinMode(LED3_B, OUTPUT);
  pinMode(LED4_R, OUTPUT);
  pinMode(LED4_G, OUTPUT);
  pinMode(LED4_B, OUTPUT);
  Bridge.begin();      // RouterBridge to the Linux side
}
The LED pins are declared OUTPUT up front, and Bridge.begin() wires the sketch to the board's router process for networking.
6.2 fetchCelsius(): get the real temperature
bool nws = false;
if (client.connectSSL("api.weather.gov", 443, "") >= 0) {
nws = true;
}
if (nws) {
client.println("GET /stations/KLUL/observations/latest HTTP/1.1");
client.println("Host: api.weather.gov");
client.println("User-Agent: arduino-unoq/1.0");
client.println("Connection: close");
client.println();
} else if (client.connect("api.open-meteo.com", 80) >= 0) {
client.println("GET /v1/forecast?latitude=31.69&longitude=-89.13"
"¤t_weather=true HTTP/1.1");
client.println("Host: api.open-meteo.com");
client.println("Connection: close");
client.println();
} else {
return -1000; // no network at all
}
// read into resp[] for up to 10 s, then client.stop()BridgeTCPClient::connect() / connectSSL() return 0 on success and −1 on failure — not the usual 1/0. Always check >= 0 (or < 0 to fail). Using if (client.connect(...)) inverts the logic and makes every fetch fail.An empty cert string ("") tells the board's router to verify TLS against its own system CA store — the UNO Q ships with ISRG Root X1 in /etc/ssl/certs/, so api.weather.gov's Let's Encrypt chain validates with nothing embedded in the sketch.
6.3 Parsing the observation
const char* w = strstr(resp, "\"temperature\"");
const char* p = strstr(w, "\"value\"");   // NWS format
p = strchr(p, ':');
p++;                                        // skip ": "
int sign = 1;
if (*p == '-') { sign = -1; p++; }
int c = 0;
while (*p >= '0' && *p <= '9') {
  c = c * 10 + (*p - '0');
  p++;
}
if (*p == '.' && *p + 1 >= '5') { c++; }    // round up .5+
return sign * c;                            // whole degrees C
No JSON library needed — the code finds "temperature" then "value" and hand-parses the integer with one decimal, rounding halves up. A null reading or a missing field returns -1000 (shown as NO NET).
6.4 The display loop and the LED rule
void setLeds(int f) {
  bool hot = (f >= 99);                     // the one-line threshold
  analogWrite(LED3_R, hot ? 255 : 0);       // PWM is inverted
  analogWrite(LED3_G, 0);
  analogWrite(LED3_B, hot ? 0 : 255);
  digitalWrite(LED4_R, hot ? LOW : HIGH);   // active-low
  digitalWrite(LED4_G, HIGH);
  digitalWrite(LED4_B, hot ? HIGH : LOW);
}

// in loop(): convert C → F, show on the matrix
int f = (c * 9 + 2) / 5 + 32;   // rounded C→F
setLeds(f);
if (f < 100) {
  matrix.textFont(Font_4x6);
  matrix.beginText(0, 1, 255, 255, 255);
  matrix.print(num);            // e.g. "95F"
  matrix.endText(NO_SCROLL);    // static 5 s
  delay(5000);
}
The °F conversion uses integer math with a rounding constant (+2), and 2-digit temperatures are rendered static in Font_4x6 for readability. Everything above 99 °F scrolls instead.
7. Build & Flash
Clone the repo
git clone https://github.com/charlesscrimpshire/unoq-weather-matrix.git
cd unoq-weather-matrixPlug in the board
Connect the UNO Q over USB. Check the serial port:
ls /dev/ttyACM* # typical UNO Q portFlash it
The helper wraps the full arduino-cli compile + upload with the right board core and env vars:
./scripts/flash.shEquivalent raw commands (FQBN is arduino:zephyr:unoq):
arduino-cli compile --fqbn arduino:zephyr:unoq unoq-weather-matrix
arduino-cli upload -p /dev/ttyACM0 --fqbn arduino:zephyr:unoq unoq-weather-matrixdialout group to access the serial port: sudo usermod -a -G dialout $USER, then log out and back in.8. The Linux Companion
The MCU can't touch LED1/LED2 — they live under the Linux side. A 30-line script closes the loop:
URL = "https://api.weather.gov/stations/KLUL/observations/latest"
LEDS_BLUE = {"red:user": 0, "green:user": 0, "blue:user": 1,
             "red:panic": 0, "green:wlan": 0, "blue:bt": 1}

def set_leds(mapping):
    for name, value in mapping.items():
        with open("/sys/class/leds/%s/brightness" % name, "w") as f:
            f.write(str(value))

# every 30 s: fetch KLUL, convert to °F, flip the two LEDs
f = int((value * 9 + 2) / 5 + 32)
set_leds(LEDS_RED if f >= 99 else LEDS_BLUE)
Deploy and start it on the board's Linux side with:
./scripts/run_temp_leds.shThat pushes temp_leds.py to /home/arduino/ and launches it in the background with logs at /home/arduino/temp_leds.log.
9. Troubleshooting
| Symptom | Likely cause | Fix |
|---|---|---|
Matrix shows NO NET | Inverted connect() check, or the fetch failed | Verify connectSSL(...) >= 0; check the buffer is ≥8 KB; confirm the NWS User-Agent header is sent |
| LED1/LED2 don't change | Companion script not running | Run ./scripts/run_temp_leds.sh; check /home/arduino/temp_leds.log |
| LED3/LED4 inverted or wrong | LED3 PWM is inverted, LED4 is active-low | Follow the pin table in §3 — don't treat them like plain common-anode LEDs |
| Temp never changes / always 95 | Observation cached at the same value | KLUL updates ~every minute; give it time, or hit the endpoint in a browser to confirm |
| Flashing fails / port not found | Port permissions or wrong port | Join dialout; set PORT or check ls /dev/ttyACM* |
10. The Router Socket-Leak Fix
The UNO Q's networking runs through a companion process (arduino-router, a Go binary on the Linux half) that proxies RouterBridge calls over TCP/TLS. While this project ran for hours with the network down, that router slowly leaked sockets until it crashed.
The symptom
After ~4.7 hours of repeated failed fetches, the router held 671 open file descriptors — a growing pile of CLOSE-WAIT entries in lsof -i — until the process died. The board still rebooted fine; only the router was stuck.
The root cause
In the router's TLS read path, when a read returned (n > 0, io.EOF), the code discarded the received bytes and returned an RPC error instead of handing them to the caller. The MCU's tcp_client.h sees that error and sets _connected = false — so client.stop() skips the tcp/close call, and the router's connection map keeps the socket forever.
The fix
// EOF or timeout WITH data: deliver the bytes
if n > 0 {
    return res(buffer[:n], nil)
}
// clean EOF: close and forget the socket
delete(liveConnections, id)
_ = c.Close()
Data arriving on a closing connection now reaches the caller, and a clean close removes the entry instead of leaking it.
arduino/arduino-router — if you run into the same leak, rebuild from the patched internal/network-api/network-api.go or upstream will need an equivalent patch.After re-flashing and rebooting, the router's fd count stayed flat (11–12) over 2.5 minutes of live fetches with no accumulating CLOSE-WAIT — the leak is gone.
11. Next Steps & Ideas
Once the matrix is alive, there are easy ways to level it up:
- Weather, not just temp — pull conditions from the same observation (wind, humidity) and show short icons between readings.
- Auto location — ask the NWS API for the nearest station to a configured lat/lon instead of hardcoding KLUL.
- Sunset-aware colors — let the LED threshold color shift (e.g. amber at night) based on the observation's timestamp.
- Local sensor — add a wired temp/humidity sensor on the MCU as a check against the station.
- History — log readings on the Linux side and render a tiny trend sparkline on the matrix.